Note: Robotstudio is not available for oversea users, please use framegrabber for connection with PC.
For more information, please refer to the forum communication.
Package Integrity Check
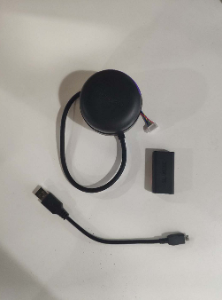
The complete lidar package includes:
A1 radar: lidar, adapter board, cable
A2 radar: lidar, usb serial adapter board, USB cable
A3 radar: lidar, USB serial adapter board, USB cable
S1 radar: lidar, USB serial port adapter board, USB cable
Functional check
-
Before testing the radar function, please make sure to use the original accessory board and USB cable of the radar, and the user’s own adapter board and USB cable. The function of the lidar cannot be guaranteed and verified.The USB adapter uses the CP2102 chip to convert the serial (UART) to USB signal. Therefore, it is necessary to install the corresponding driver on the The corresponding driver needs to be installed in the PC system.The driver can be found in the accompanying SDK package or downloaded from Silicon Labs’ official website: Please select the 32-bit version (x86) or 64-bit version according to the operating system version. (x86) or 64-bit (x64) version of the installer, depending on the operating system version
Silicon Labs
-
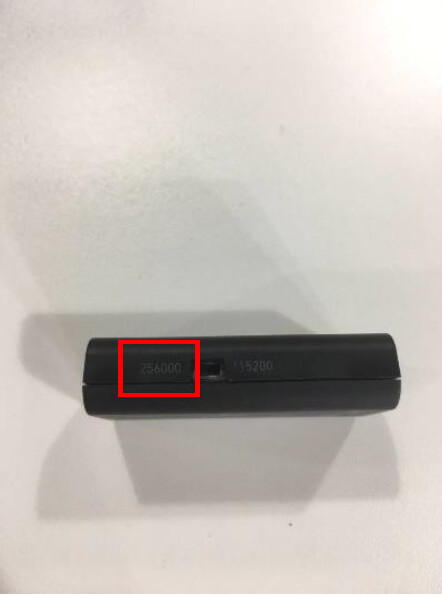
Connect the lidar to the adapter board and USB cable. The accessory boards of A3 and S1 radars have two-speed baud rate switches. A3 and S1 radars need to choose 256000 files, and A2 radars need to choose 115200 (A2M7 radars are special, You need to choose 256000), and the A1 radar can be directly connected to the included cable and adapter board.S2M1 radar need to choose 1M.
-
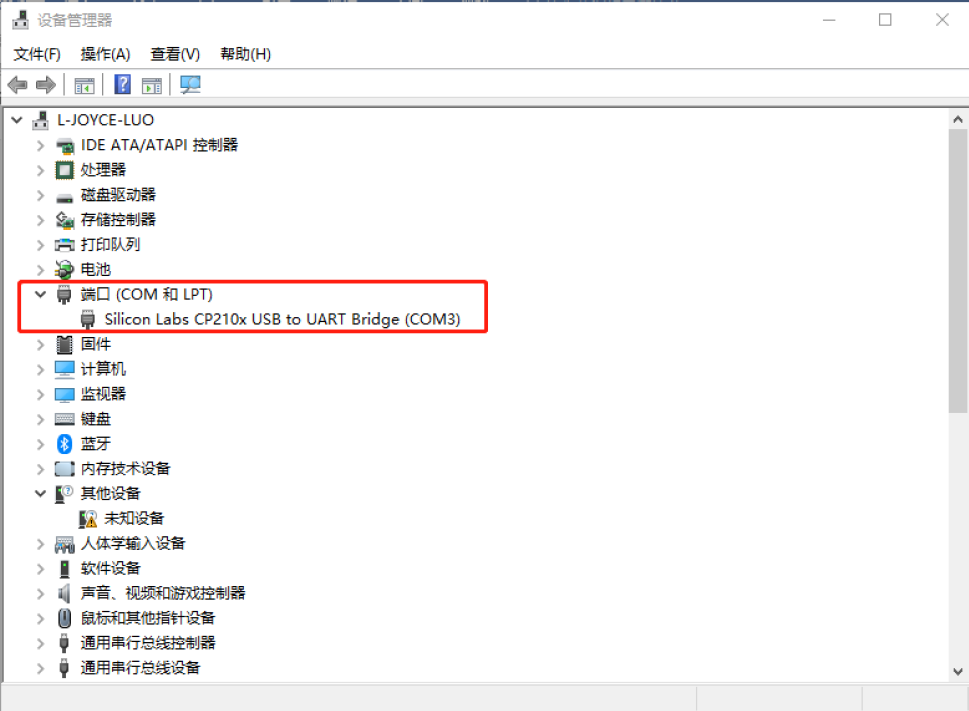
Connect the other end of the USB cable to the USB port of the computer (windows system), and check whether the radar device is recognized in the device manager port, as shown in the figure below.
Radar S2: Connect the USB adapter to the PC via the Micro-USB cable and connect one end of the power adapter to the power supply and the other end to the Connect the power adapter to the power supply on one end and to the USB adapter on the other end. If the PC is already booted, the USB adapter can be observed after the USB cable is After the USB cable is connected, you can observe that the USB adapter light is on and the RPLIDAR S2 module is not Rotate.

【Notice】
- If the serial port cannot be recognized, please try to reinstall the CP2102 driver in the SDK.
- If the serial port is still not recognized after installing the driver, please try another computer.
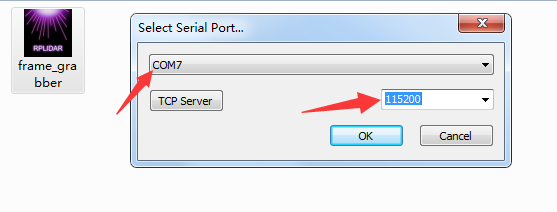
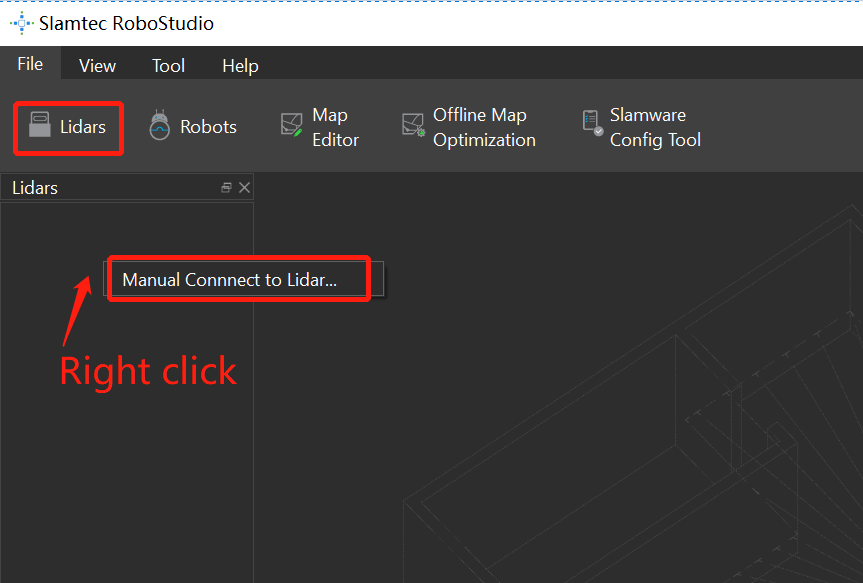
- Open the Robostudio software, click the radar plug-in section after registration and login, right-click the blank part of the left window, connect the radar, the recognized serial port (COM3 by default) connected to the radar will pop up, click connect. Check whether the radar ranging interface can be displayed normally.
Public_framegrabber tool interface
【Notice】
If the ranging interface cannot be displayed and an error pops up, please take a screenshot of the error and take a picture of the QR code of the serial number at the bottom of the radar, and send it to vip@youyeetoo.com
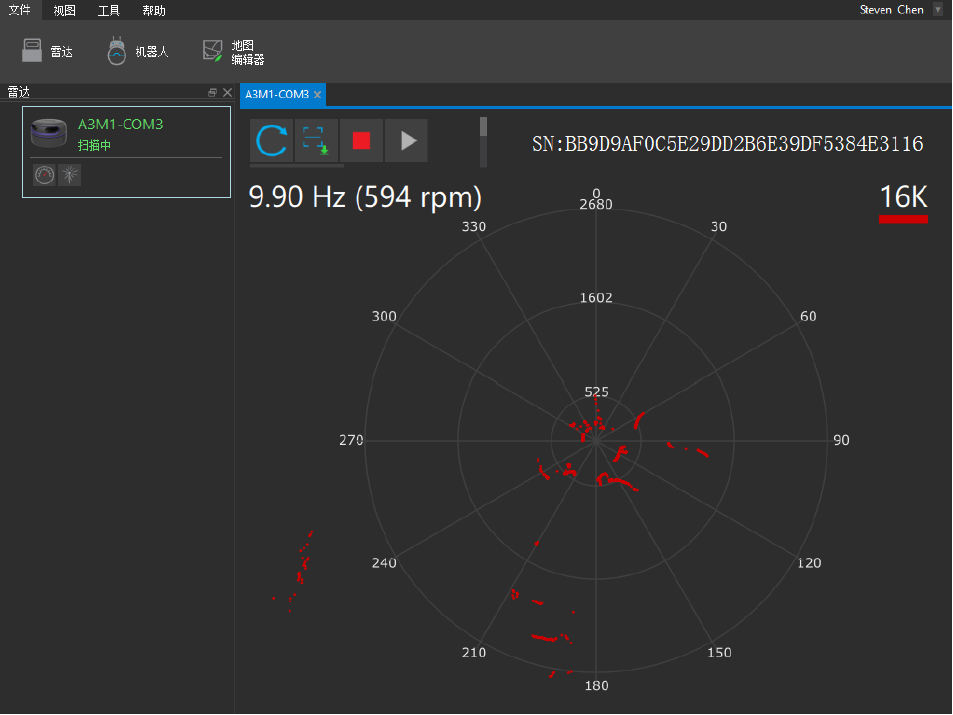
- After connecting the radar, click the green triangle button to start scanning, the radar starts to rotate and output laser points. As shown below:
Public_framegrabber tool interface

【Notice】
If the radar rotates normally, but there is no laser point output, please take a picture of the QR code of the serial number on the bottom of the radar and send it to support@youyeetoo.com
- Check whether there is an obvious mechanical abnormal sound when the radar is rotating. If there is an abnormal sound, it may be caused by hitting or falling at the user.