Introduction
The ROCK Pi X BIOS is based on the AMI(American Megatrends, Inc) AptioV BIOS with UEFI and 64bit OS support, providing a user friendly interfaces to manage the OS booting/installing and it has a built in UEFI shell, which is convenient for developers to debug.
Check version
-
Power on ROCK Pi X, keep pressing the del button on the keyboard until it enters the BIOS.
-
After entering the BIOS, use the left and right arrow keys to switch to the “Main” interface.
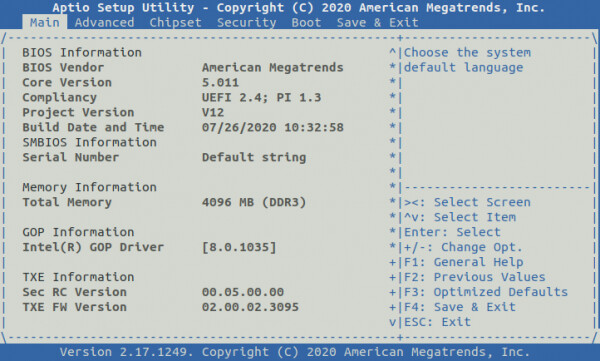
Check the version of “Build Data and Time”.
Check eMMC
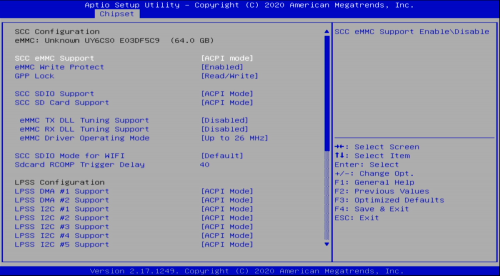
For V1.3 and earlier hardware, the eMMC is pluggable, you can check if the eMMC is installed well in the BIOS menu:
Go to Chipset → South Bridge → LPSS & SCC Configuration to check if eMMC is detected.
UEFI Shell
The UEFI Shell is a shell/terminal for the firmware which allows launching EFI applications which include UEFI bootloaders. Apart from that, the shell can also be used to obtain various other information about the system or the firmware like memory map (memmap), modifying boot manager variables (bcfg), running partitioning programs (diskpart), loading UEFI drivers, editing text files (edit), hexedit etc.
The UEFI Shell can be accessed by Serial Console or HDMI Display.
Common Used Command
exit
If you go to the UEFI Shell by accident, you can type exit to go back to BIOS interface.
map
Check the disk mapping for the available storage, you can use it to detect if the eMMC or the USB driver is detected by BIOS.
fs0: ls
Change current disk to the first disk scanned and list the content, FAT and NTFS file system are supported.
BIOS Update
Check RockpiX/bios/update