1.1 Windows Firewall Settings
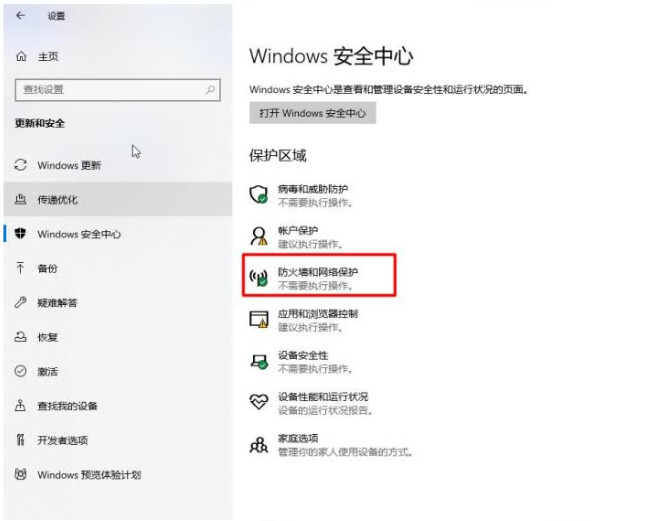
Set up a firewall to allow the M10 host computer program to obtain a large number of data packets through the network. In “Update and Security” under “Settings”, click “Firewall and Network Protection” to enter the firewall settings interface.
In the firewall settings interface, click “Allow applications through the firewall”.
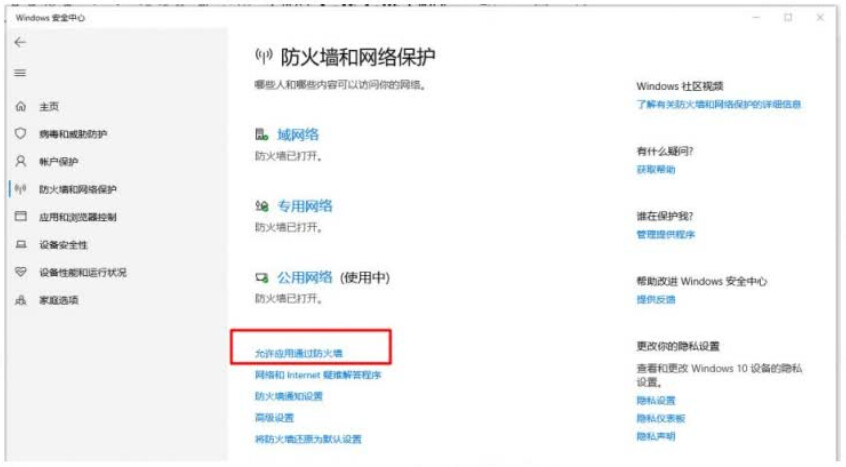
Click “Change settings” and then “Allow other apps.”
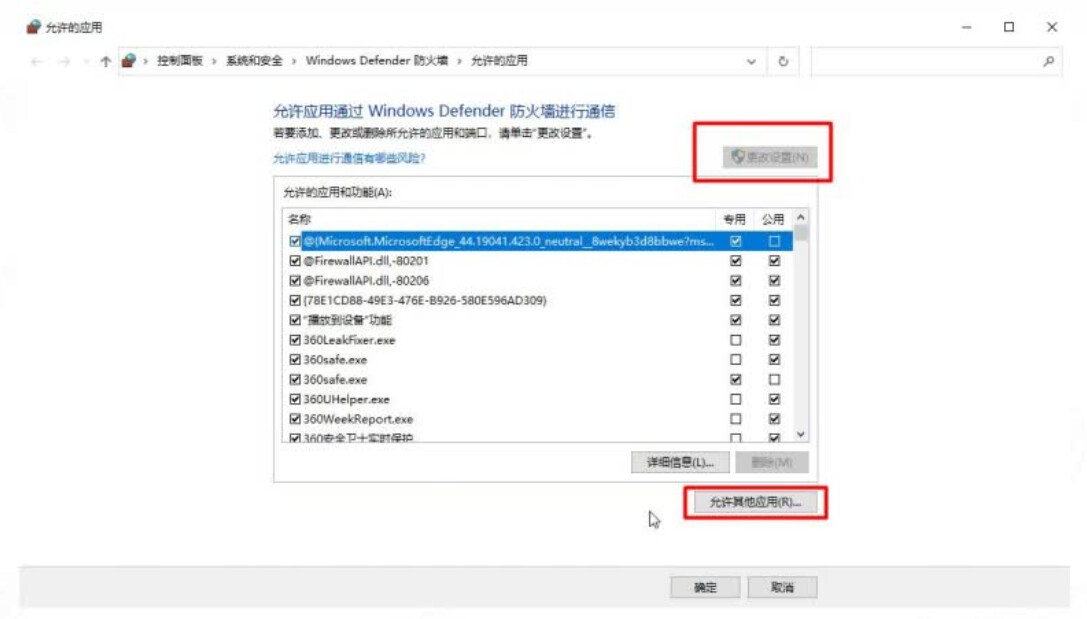
Click “Browse”, then select the M10 host computer exe application software, and click “Add”.
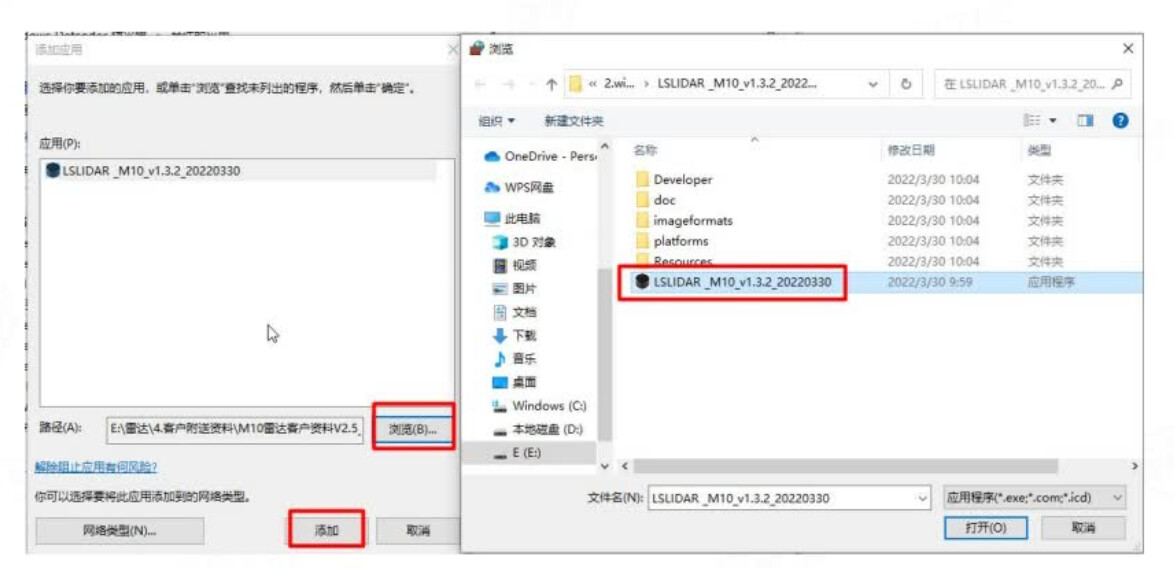
At this point, you can see the M10 host computer software in the list, click OK.

1.2 Connect to computer
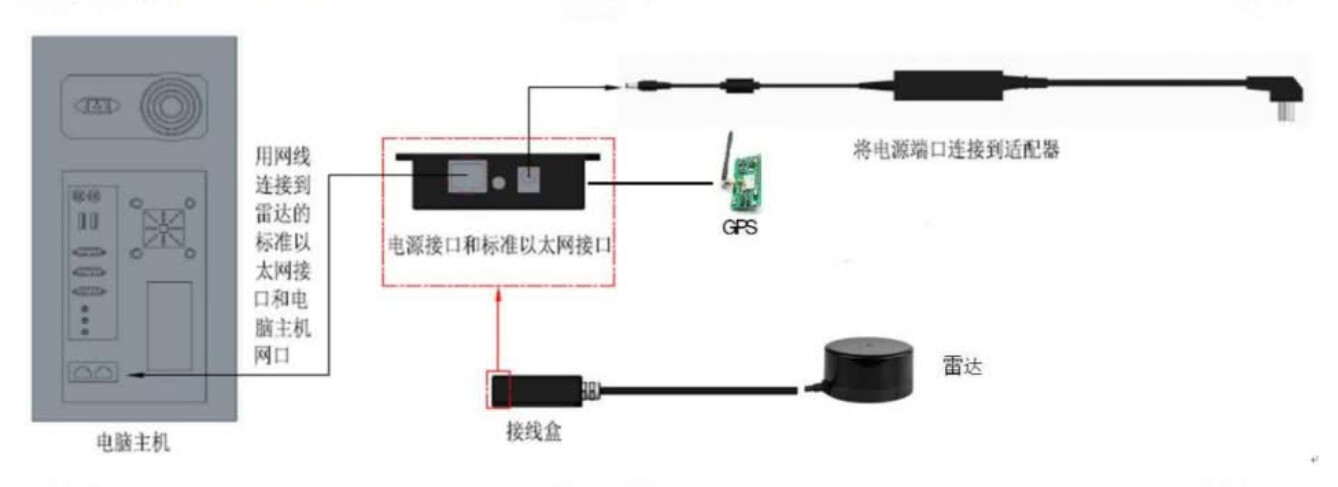
Connect the radar to the junction box, use the network cable to connect the junction box and the computer, and then supply power to the junction box. The power supply range of the junction box is 3.3V~15V.
1.3 Set IP address
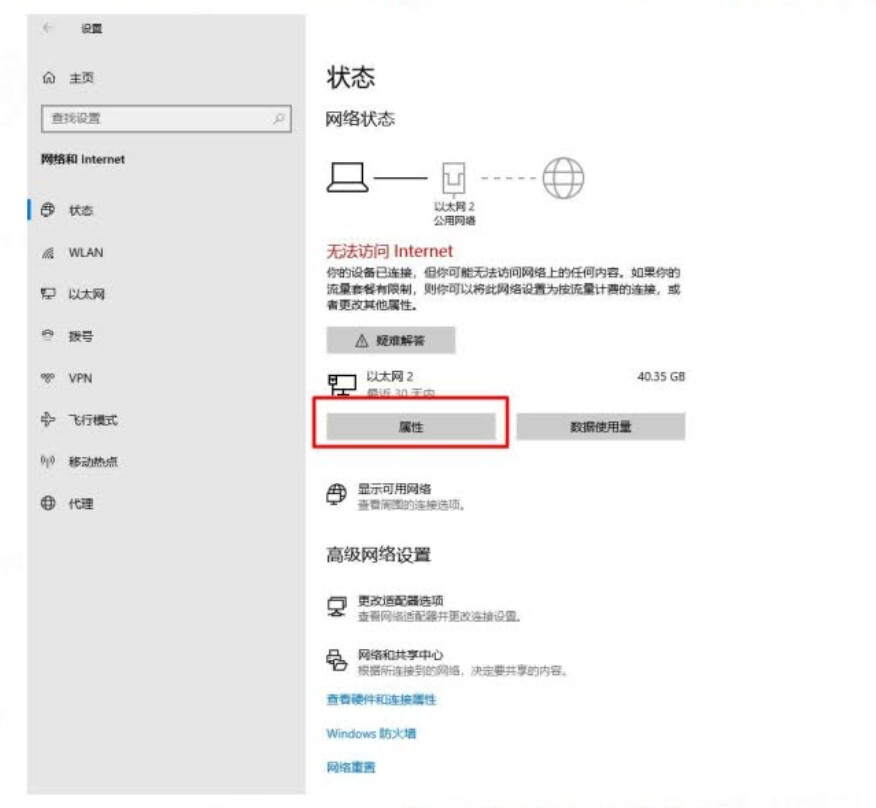
In the settings, open “Network and Internet”, click “Properties” under the network corresponding to the radar.
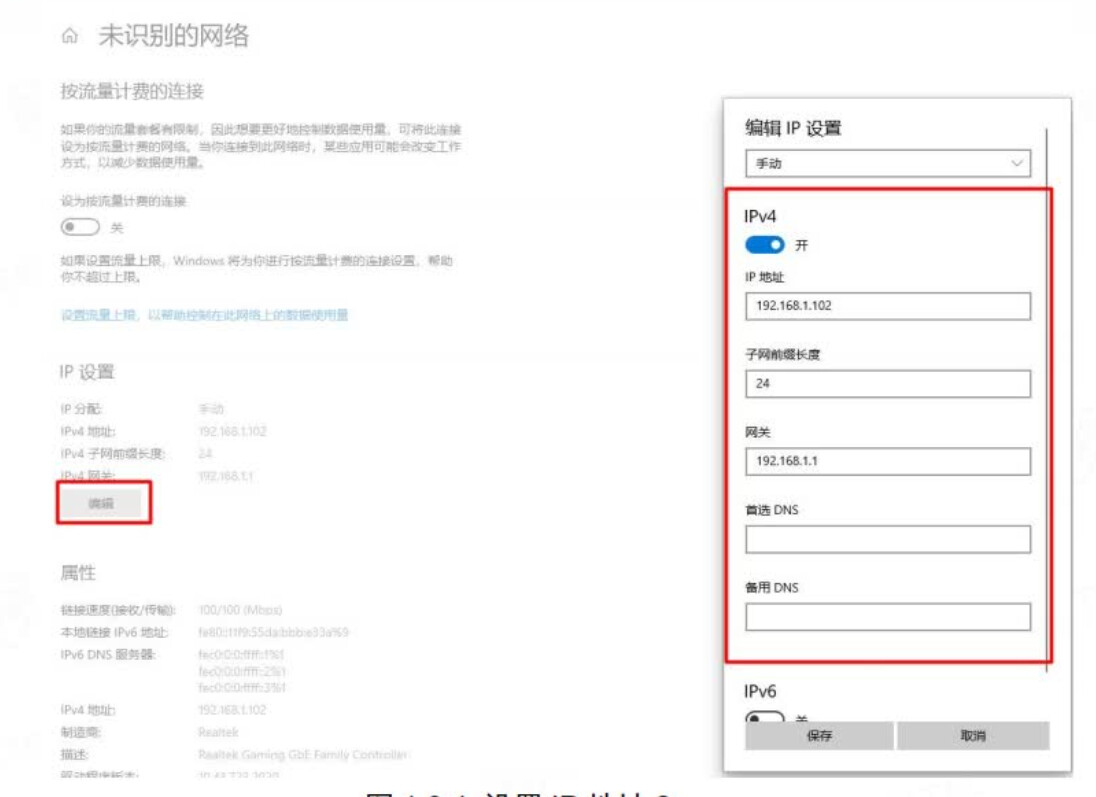
Then click “Edit”, select “Manual” in “Edit IP Settings”, open “IPv4”, and then modify the settings correctly according to the picture, and click Save when the settings are completed.
1.4 Connect using the host computer
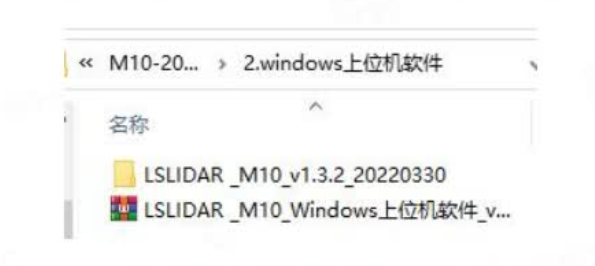
Unzip the compressed package in the Windows PC software to get the following folder.
Go to the unzipped folder, find the exe file, and double-click to run it.

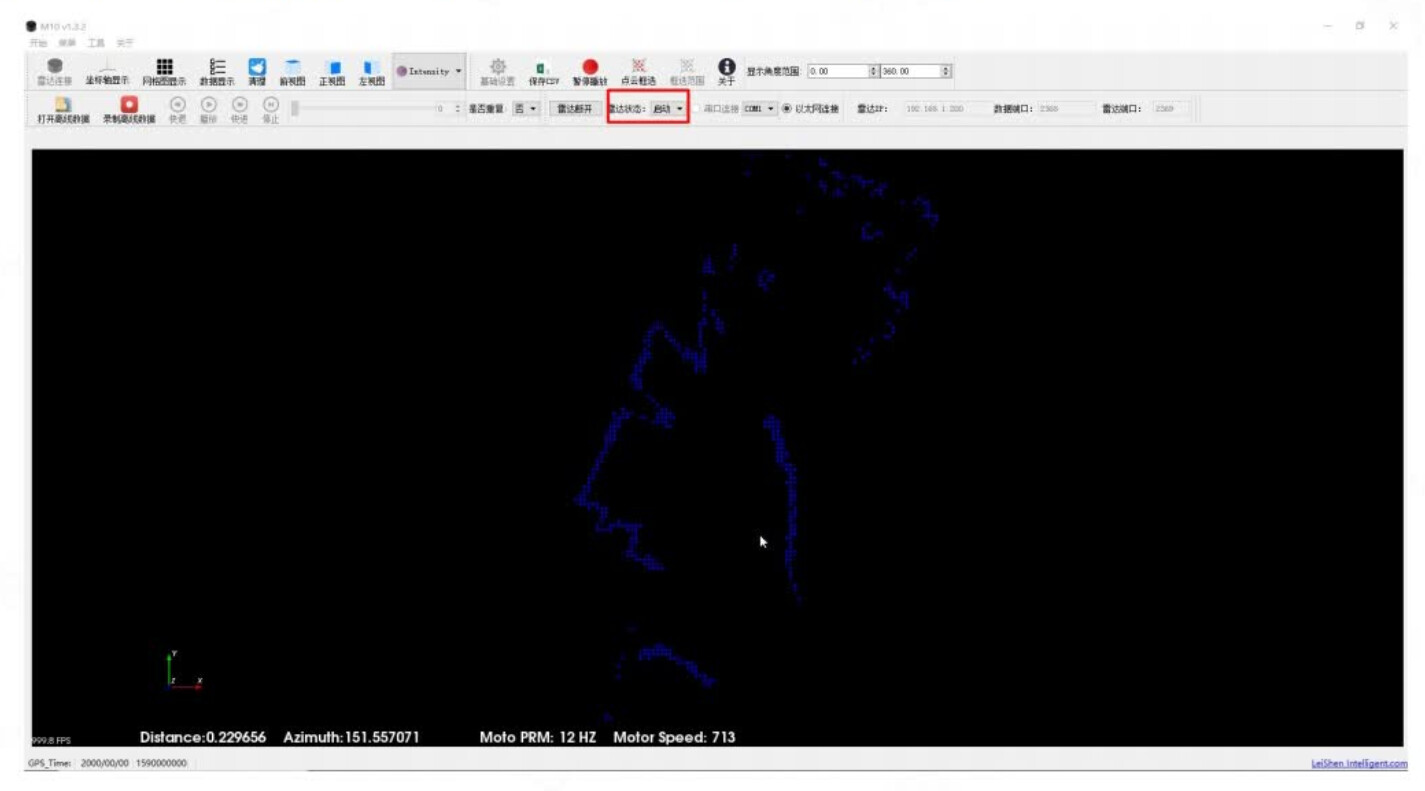
After turning on the host computer, select “Ethernet Connection”, the radar IP is set to: 192.168.1.200, the data port number: 2368, and the radar port: 2369.
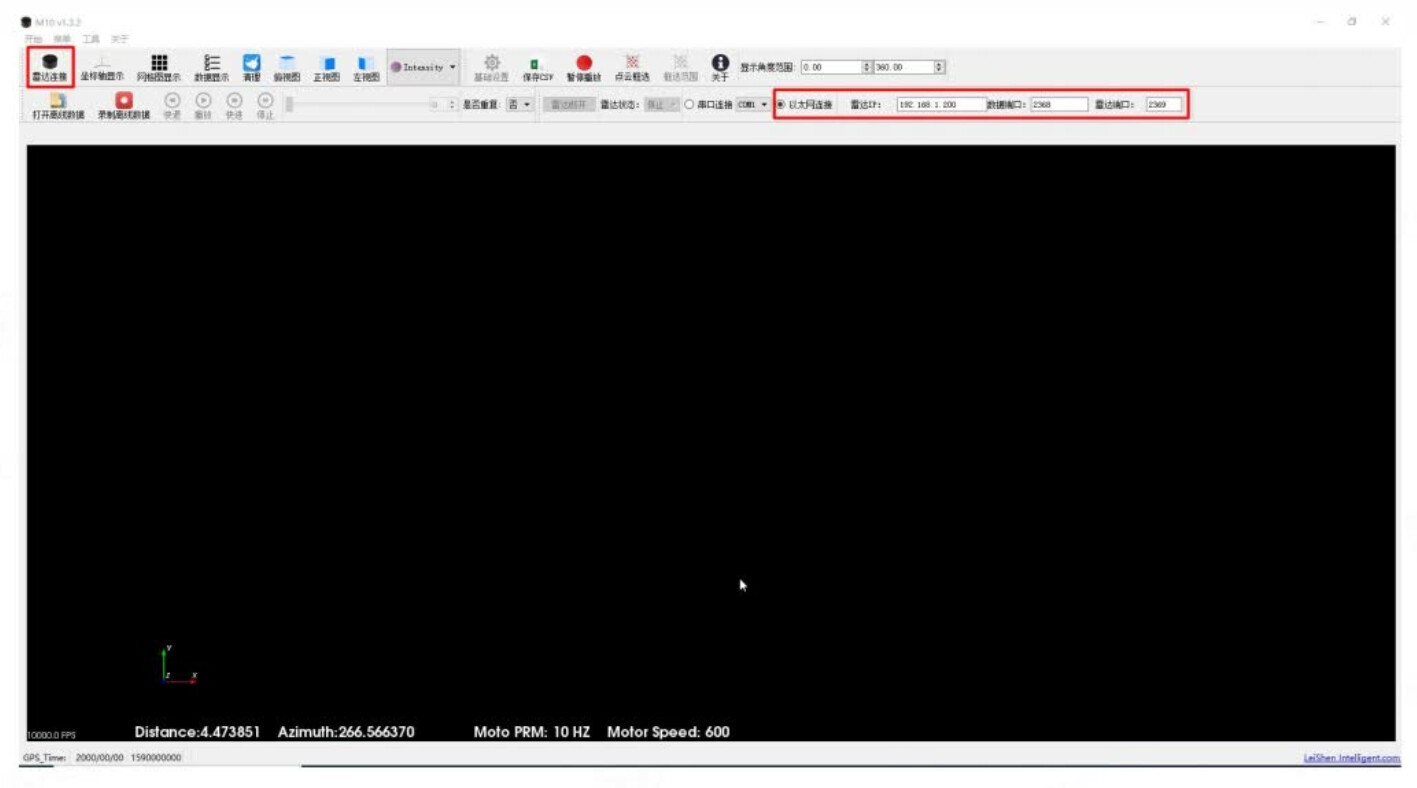
Then click “Radar Connection” in the upper left corner, then “Radar Status” in the middle, and select “Start”. We can connect our radar correctly and display the radar point cloud data in the host computer.